Home Insteading With Cooperative Extension (Week 37)
go.ncsu.edu/readext?756343
en Español / em Português
El inglés es el idioma de control de esta página. En la medida en que haya algún conflicto entre la traducción al inglés y la traducción, el inglés prevalece.
Al hacer clic en el enlace de traducción se activa un servicio de traducción gratuito para convertir la página al español. Al igual que con cualquier traducción por Internet, la conversión no es sensible al contexto y puede que no traduzca el texto en su significado original. NC State Extension no garantiza la exactitud del texto traducido. Por favor, tenga en cuenta que algunas aplicaciones y/o servicios pueden no funcionar como se espera cuando se traducen.
Português
Inglês é o idioma de controle desta página. Na medida que haja algum conflito entre o texto original em Inglês e a tradução, o Inglês prevalece.
Ao clicar no link de tradução, um serviço gratuito de tradução será ativado para converter a página para o Português. Como em qualquer tradução pela internet, a conversão não é sensivel ao contexto e pode não ocorrer a tradução para o significado orginal. O serviço de Extensão da Carolina do Norte (NC State Extension) não garante a exatidão do texto traduzido. Por favor, observe que algumas funções ou serviços podem não funcionar como esperado após a tradução.
English
English is the controlling language of this page. To the extent there is any conflict between the English text and the translation, English controls.
Clicking on the translation link activates a free translation service to convert the page to Spanish. As with any Internet translation, the conversion is not context-sensitive and may not translate the text to its original meaning. NC State Extension does not guarantee the accuracy of the translated text. Please note that some applications and/or services may not function as expected when translated.
Collapse ▲4-H at Home
Camaryn Byrum, 4-H Agent
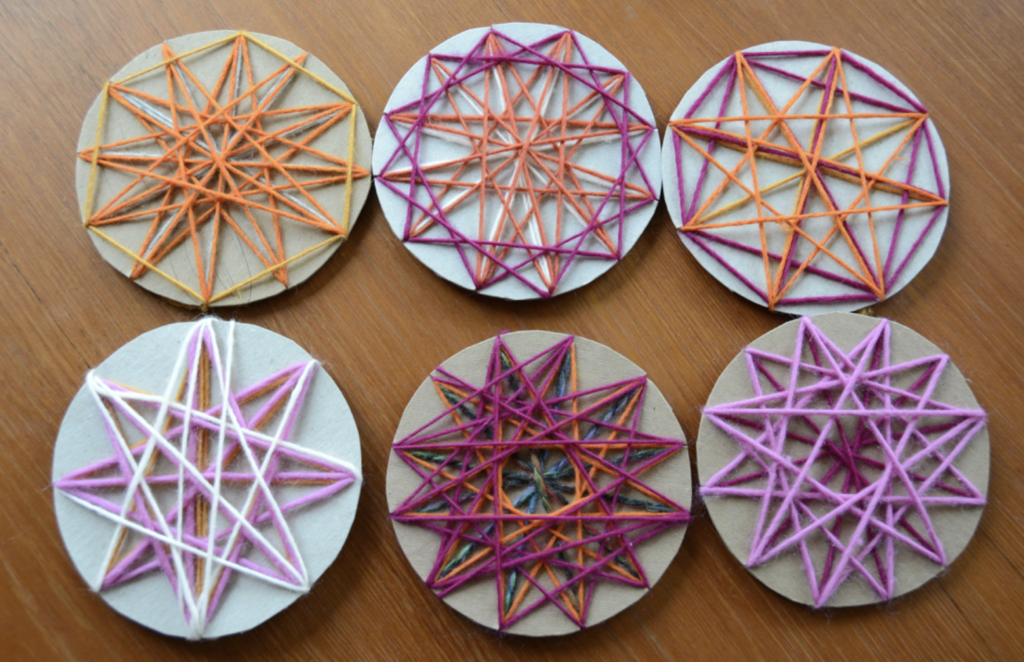
Star Weaving Ornaments
With Christmas right around the corner, now is the time to start decorating, listening to Christmas music and making homemade gifts for your loved ones. Below are instructions on how to make Do It Yourself ornaments with yarn and cardboard. These ornaments will make a one-of-a-kind gift for a family member or friend.
Star Weaving Ornaments
Supplies: cardboard, scissors, pen/ pencil, yarn and bowl (optional)
Directions:
- Cut out cardboard circles. You can use a bowl to trace the circular shape onto the cardboard. Sizes may vary.
- Mark 8 to 12 even notches along the edge of the circle.
- Use scissors to cut the notches (about 1-2 cm long)
- Choose your yarn color. Tie a knot at the end of a piece of yarn. Slot the yarn into one of the notches, with the knot at the back of the cardboard.
- Start weaving the yarn through the notches, forming a star shape.
- When your weaving is complete, tape the end of the yarn to the back of the cardboard. Add a loop of ribbon to hang on the tree.
Activity and photo can be found here.

Family and Consumer Sciences at Home
Mary Morris, Family and Consumer Sciences Agent
The “Re-jubilation” of Turnip Greens and Pecan Pie
The stars of the show this year at my house were the turnip greens and the pecan pie. Like many families this year we stayed at home for Thanksgiving, this is the first year that I have prepared the full thanksgiving meal. Everything was delicious but we had rave reviews on the turnip greens and the pecan pie. So much that I was encouraged to share these in my weekly article.
Several weeks before Thanksgiving friends of ours invited us to come over to their field and pick turnip greens. I absolutely love turnips and use not only the greens but the turnip also. We picked a huge bag of both turnips and greens (some people call them salad greens). My great grandmother always had turnip greens for the holidays, so this year I decided I would go ahead cook them up, freeze them so we could have them at Thanksgiving. My methods aren’t totally healthy but not as bad as the more traditional ways of making greens. I used chicken broth and the salty ham chips for flavor instead of fatback or pork jowl. I did add a couple of tablespoons of bacon grease to get the consistency right. They turned out perfectly. On the morning of, I pulled them out of the freezer, heated and viola! they were ready. I chopped not only the greens but cut up peeled turnips and boiled them all together. The actual turnip adds so much flavor to the greens.
The pecan pie was a throwback to yonder years when people didn’t have corn syrup at the grocery store. The South Carolina recipe uses cornmeal and white vinegar instead. The pecans were local they came straight out of my yard, cracked by Mr. White and picked out by hand. I did not make the crust from scratch I did cheat a little and buy the frozen pie crust. There is so much satisfaction in knowing where your food is coming from and then creating something that everybody loves. When they say food can be a message of love it so true!!
Here are the recipes that I used for both in case you want to try.
Turnip Greens
2lbs Fresh Turnip Green leaves, 2 whole med/large Turnips, 1 pkg of salty ham chips, 38 oz of Chicken Broth, 2 TBLSP Bacon Grease, Salt and Pepper to taste
Wash and strip greens from stalks, chop greens. Wash and peel turnips, chop into cubes. Add greens, turnips, ham chips, bacon grease, and chicken broth to large stock pot. Bring to boil, then simmer for about 45 min. Salt and pepper to taste. Serve with hot vinegar.
Horticulture at Home
Katy Shook, Area Horticulture Agent
Transplanting Trees from The Woods: FAQs
Can trees be transplanted from the woods? Yes, if a homeowner has permission from the landowner and is willing to take the necessary steps, transplanting trees from a wooded lot is an economical way to establish new trees in a home landscape.
What types of trees can be transplanted? Trees best suited for transplanting from the woods usually grow along the woods edge. When choosing a tree to transplant, make sure to select a healthy, evenly branched tree that has been exposed to wind and sun. Younger trees work best.
What steps should be taken before moving the tree? First, tag the tree. Next, ideally in the late winter or early spring, lightly root-prune the tree. Sever half the roots by forcing a sharp spade into the soil (8 to 10 inches deep) as far from the trunk, leaving a shovel width of untouched soil between cuts. Incorporate as much of the root zone as can practically be moved. For older trees it’s best to repeat the process again in the fall, severing the other half of the roots. Transplant trees in the spring when roots have a chance to quickly regrow.
What other steps can be taken to ensure success? Position the tree so that all sides of the trunk are facing the same direction in the new landscape as in the woods (north side of the trunk still faces north, etc.). Also, try to mimic the amount of sun or shade the tree was previously receiving. Loosely stake newly transplanted trees. If a plant seems too large to move, contact a local landscaper. Keep the tree well-watered, especially during drought for the next several years, or until re-established.
For more information about transplanting trees, contact the Ask A Master Gardener Helpline at (252) 482-6585.

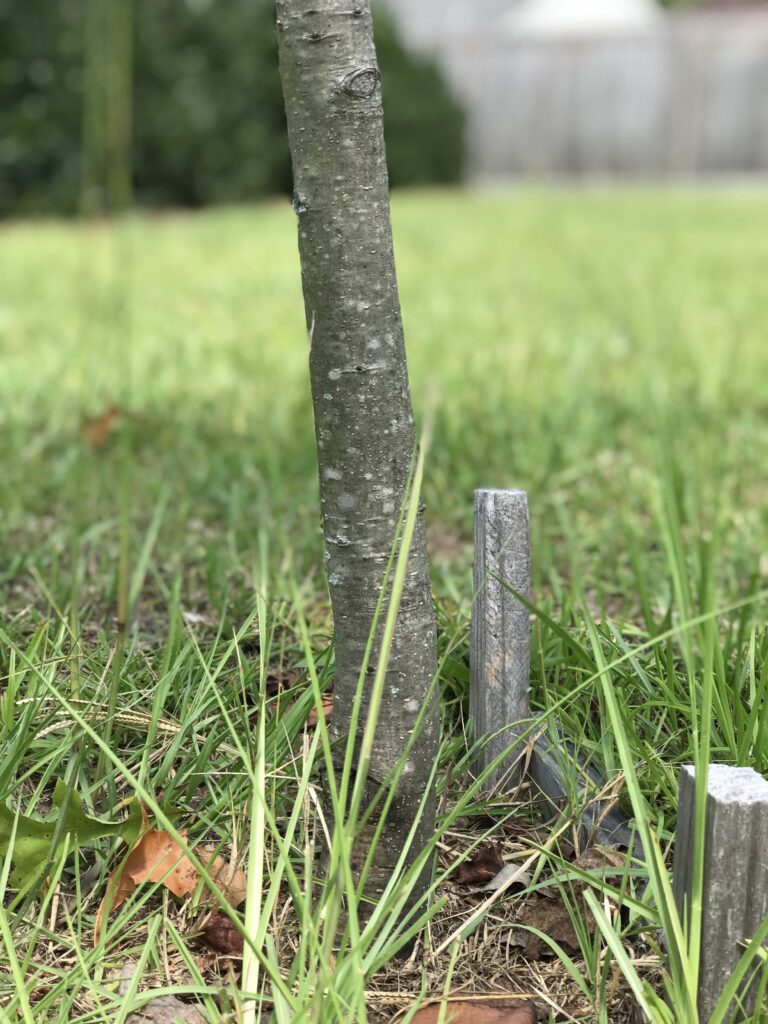
This alternate method of staking holds the root ball down without using above ground materials that can be unsightly and trip hazards. These stakes break down naturally, and do not need to be removed.


